The project files along with any additional documentation are located in this folder on my Google Drive.
To download the game please download the MiniMiner.zip and either run the .exe file within the testproject folder, to open it up the project in Unity.
Monday, 28 May 2018

References
References
Bunny83. 2015. C# Time.time Hours?. [ONLINE] Available at: https://answers.unity.com/questions/1101475/c-timetime-hours.html.
[Accessed 28 May 2018].
Çetin, S.
T. (17, May 14). Unity 5 - What is
the proper way to handle data between scenes? Retrieved from: https://gamedev.stackexchange.com/questions/110958/unity-5-what-is-the-proper-way-to-handle-data-between-scenes?utm_medium=organic&utm_source=google_rich_qa&utm_campaign=google_rich_qa.
[Accessed: 28 May 2018]
Enrique Moreno Tent. 2015. Unity 5 -
What is the proper way to handle data between scenes. [ONLINE] Available
at: https://gamedev.stackexchange.com/questions/110958/unity-5-what-is-the-proper-way-to-handle-data-between-scenes?utm_medium=organic&utm_source=google_rich_qa&utm_campaign=google_rich_qa. [Accessed 28 May 2018].
gamesplusjames. (2015). Unity RPG Tutorial
- Learn to make an RPG game & learn C#! [Playlist] . [Online Video]. 11 November 2015.
Available from: https://www.youtube.com/playlist?list=PLiyfvmtjWC_X6e0EYLPczO9tNCkm2dzkm.
[Accessed: 5 October 2017].
John
Hamilton. (2016). How to store
variables in between scenes? Unity [duplicate]. [ONLINE] Available
at: https://gamedev.stackexchange.com/questions/133872/how-to-store-variables-in-between-scenes-unity?utm_medium=organic&utm_source=google_rich_qa&utm_campaign=google_rich_qa. [Accessed 17 May 2018].
quill18creates. (2016). Unity Tutorial: Fast & Easy Level
Editor Technique for Platformers and RPGs. [Online Video]. 26 July 2016.
Available from: https://www.youtube.com/watch?v=5RzziXSwSsg&t=2539s.
[Accessed: 28 May 2018].
Additional Sources:
[Course]: Ben Tristem, Rick Davidson (n.d). Complete C# Unity Developer 2D – Learn to Code
Making Games. [ONLINE] [VIDEO PLAYLIST]. Available at: https://www.udemy.com/unitycourse/. [Accessed: 05 October 2017].
[YouTube Playlist]: Brackeys (2015). Inventory System Tutorial in Unity 5. [Online Video]. Available at:
https://www.youtube.com/playlist?list=PLivfKP2ufIK78r7nzfpIEH89Nlnb__RRG.
[Accessed: 28 May 2018].
Wednesday, 23 May 2018
Evaluation
Over the course
of this year I have created, designed and testing my game MiniMiner. At the start of development, I was really unsure how it
would turn out or how difficult it would be. I had no prior knowledge with
using C# or Unity, and it’s taken hundreds of hours of research to get the game
to where it currently stands.
In its current
state, the game has most of the features that I drafted out for it.
Unfortunately, there are more bugs within the game than I intended there to be,
and going forward this game would need a fair bit more development time in
order to iron out some of the creases. However, the skills that I have gathered
during this year are invaluable. I now have the skills and knowledge to be able
to write code by myself without the use of research sources. I am acquainted
with most of the Unity engine features and I’m confident to use them.
Developing this
game was a larger feat than I realised but overall, I’m happy with the way that
its turned out. I just wish that I could have implemented a few more features,
but at this point I’m confident that with a little more development I’ll be
able to get the game into a fully stable state. The biggest challenge of this
project by far was getting the inventory and shop to work. These were pretty huge
features to implement and it took me a while to grasp the logic behind for
loops. What I’ve learnt this year is how to use the Unity engine as well as how
to program in an object-oriented programming language, and how to program in
C#.
Monday, 7 May 2018
Play Test
The game is now
in a place that I feel comfortable with. Now, seeing as time is running out,
it’s time to make the game playable. Certain details of my game, such as ore
health and item prices have been left as drafted in my initial creation. These
details will need to be changed for the sake of game balancing and will also
make the game more fun. For this playtest I will be testing the game myself but
also handing it to other people to test so that I get a better insight. Every
Player will have their own playstyle and will be able to pick up bugs / changes
to the game that need to be fixed / made, changes that I won’t realise need to
be made.
UPDATE: After giving the game to a couple of peers
to play, as well as my Brother, I have discovered that there are many changes
that need to be made. A lot of the feedback that I received was that the game
just simply took too long. Progression was too slow and it took too long to
upgrade pickaxes. Because of this, I have adjusted the prices of the pickaxes,
and also increased the sell prices of ores:
Saturday, 28 April 2018
Pickaxe Upgrades, Stamina, Consumables
A lot of the
features that were mentioned in my initial design have now been implemented and
now seemed like the appropriate time to add the win conditions. These win
conditions meant adding a timer in game. I experimented with this timer, such
as its size, positioning and different colouring. I settled on reducing the
size of the milliseconds, and only displaying the appropriate values as
necessary i.e. only displaying hours once the Player had been playing for more
than one hour.
The win
condition for this game was to add the ‘Motherload’, a golden block which is
considered to be extremely valuable! Once the Player has collected this, a
prompt is added one screen instructing the Player to visit the shop in order to
turn it in. Turning this into the shop will end the game and transition the
Player to the win screen. This is just a simply screen which tells the Player
what their completion time was. This was a tricky solution to find as I didn’t
know how to carry data across scenes. The solution to my problem was using a
static variable which I found from the StackExchange
forum user (Çetin, 17) .
In his post he explained that the best way to carry data between scenes is to
store it on an object which isn’t destroyed when loading a new scene. This
object contains a script of static variables. These variables can be accessed
from any script without getting a specific reference to it, this is done by
calling [script name].[variable name]
which in my case, for example I would call PublicData.finalMinutes.
Once the Motherload has been handed in, before the new scene is loaded, the
timer is paused, and the time is passed from the timer to this script.
Thursday, 19 April 2018
Stamina, Pause Menu
Within the last
week or so I have been working on implementing a stamina system. This stamina
system gives the Player a reason to go back up to the surface and allows me to
implement a use for the consumable items. Upon starting my development of this
system, I outlined three potential interactions for this stamina system:
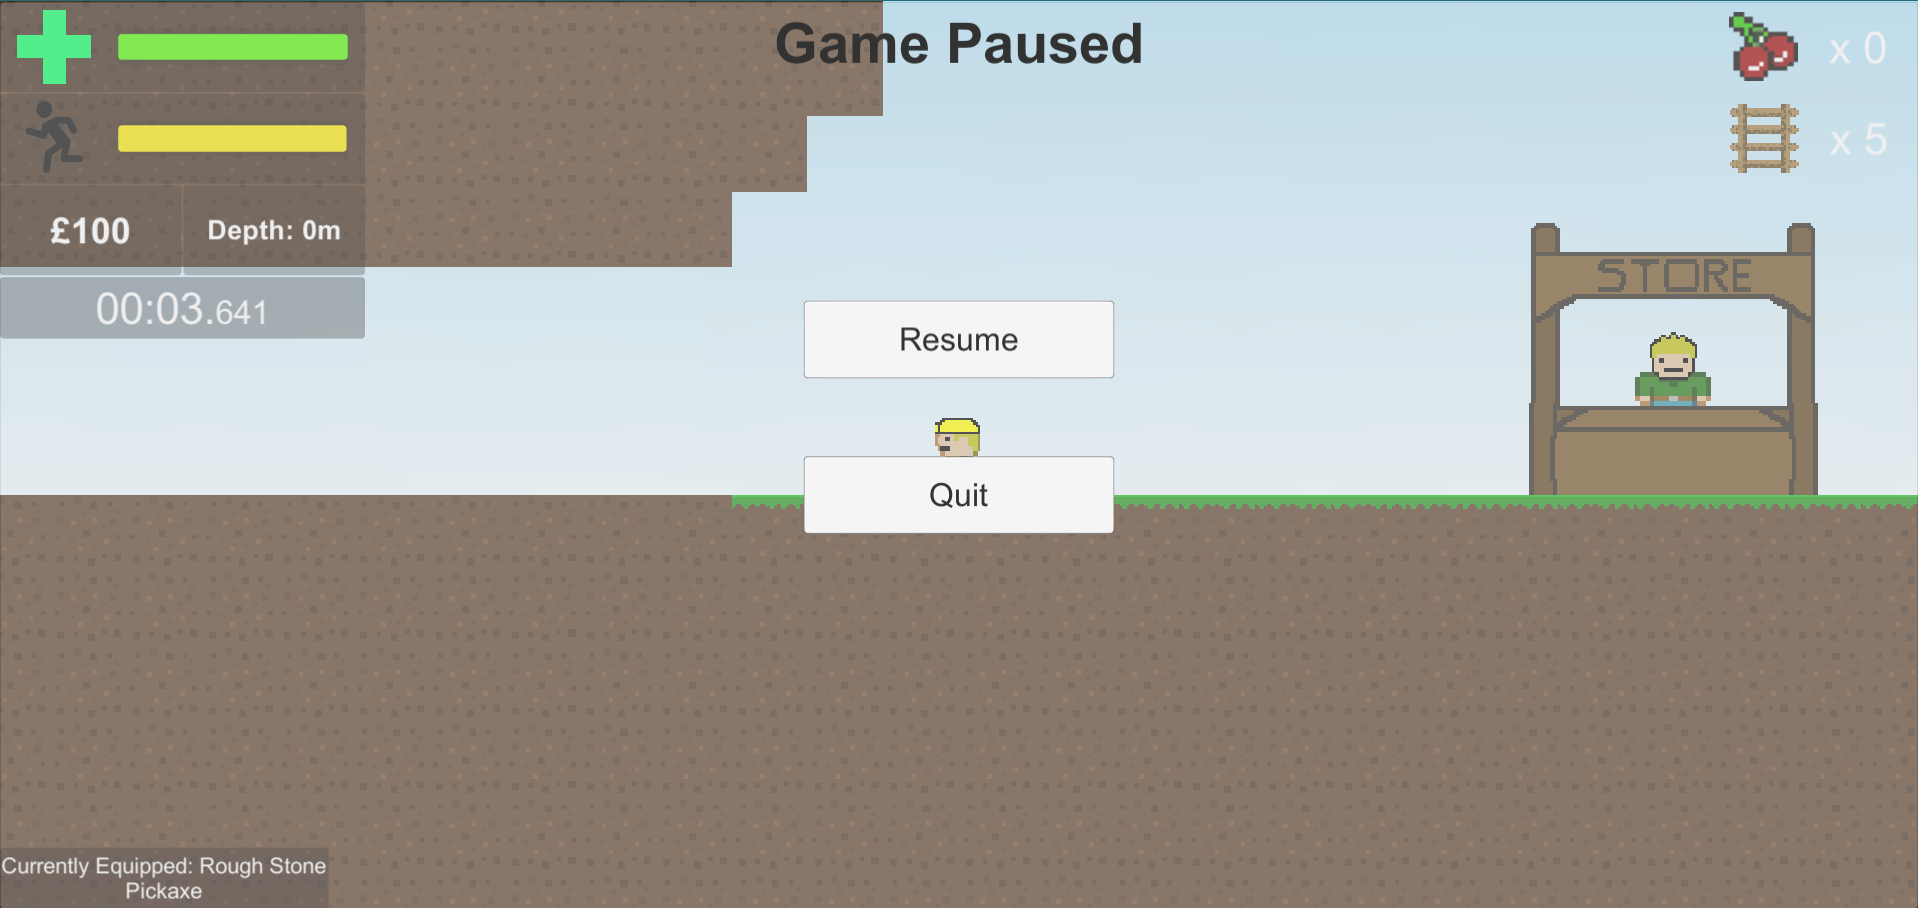
EDIT: shortly after implementing this change and submitting this post I noticed a bug with the stamina drain rate. The stamina decay rate was fluctuating constantly, sometimes it would drain quicker than normal. I couldn’t figure out the exact cause of this problem, but by moving stamina to its own script fixed this issue.
·
Stamina
will drain at a steady rate over time.
·
Increased
further when mining, even if not hitting a target ore.
·
Increased
even more if the Player is actually mining a rock.
In order to get
this system to work the way I wanted it to, some of the mining code needed to
be restructured as I couldn’t get it to work with the current system. To
implement this solution, I first needed to move all of the mining code off of
the Player and into a new script. Not only was this for peace of mind and
clarity, but also to segregate the process so that the logic could be more
easily determined. I separated the mining code into three logical steps:
1. Every frame, check if the Player is mining.
2. If they are then run the MineRock() function, which fires a
raycast.
3. If the raycast hits nothing, then stamina
will decay at a flat rate but if it did hit, then the decay rate will be
determined by the rock that they are mining.
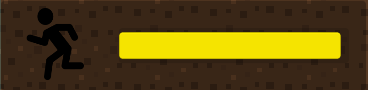
EDIT: shortly after implementing this change and submitting this post I noticed a bug with the stamina drain rate. The stamina decay rate was fluctuating constantly, sometimes it would drain quicker than normal. I couldn’t figure out the exact cause of this problem, but by moving stamina to its own script fixed this issue.
I have also
implemented a pause menu as there was no way to pause / exit out of the game up
to this point.
Monday, 9 April 2018
Pickaxe Upgrades, Consumables
In its current
state, the game feels very… slow. Mining takes forever, especially when mining
more valuable blocks. This progression through the game is intended, which is
why the Player needs a way to upgrade their mining equipment so that they can
mine blocks faster.
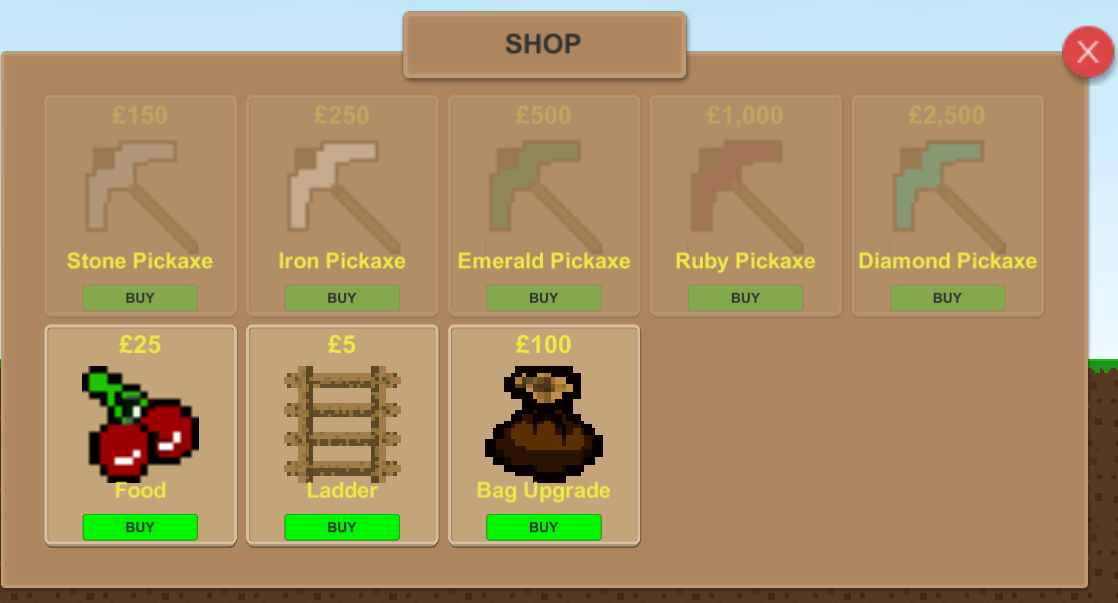
Another unintended repercussion of the inventory system are the consumables and ladders that I have added to the shop, which derive from the same script as the pickaxes and other consumables. These consumables are added to a list which is displayed on-screen in the upper-right hand corner of the screen. When used, the amount (which is stored on the object as quantity) is decremented by 1 for each item used. My solution is this problem, to distinguish which item was consumed is that each item has an enumerated ‘state’ which is defined as a category. Then whenever an item is bought from the shop, the item’s category is checked, which helps to determine the behaviour which will follow. For example, if it’s a pickaxe then the appropriate stats will be applied whereas if it’s a consumable or ladder then the quantity variable on the object is increased.
In this section
I have added Player pickaxe upgrades which are buyable from the shop. I’ve
given these upgrades some basic stats which will need to be more thoroughly
tested once the game is in a stable condition -this also goes for the cost. One
issue that I had with this system, although not necessarily a problem, is that
the objects that are created must all be the same type in order to add them to
the inventory. This is because the objects of the list are scriptable objects and
aren’t subject to monobehaviours, therefore they don’t have a script attached
to them and they don’t have their own behaviours. Because of this, I decided not
to add them to any menu or inventory, but rather just display the pickaxe that
the Player currently has equipped.
Another unintended repercussion of the inventory system are the consumables and ladders that I have added to the shop, which derive from the same script as the pickaxes and other consumables. These consumables are added to a list which is displayed on-screen in the upper-right hand corner of the screen. When used, the amount (which is stored on the object as quantity) is decremented by 1 for each item used. My solution is this problem, to distinguish which item was consumed is that each item has an enumerated ‘state’ which is defined as a category. Then whenever an item is bought from the shop, the item’s category is checked, which helps to determine the behaviour which will follow. For example, if it’s a pickaxe then the appropriate stats will be applied whereas if it’s a consumable or ladder then the quantity variable on the object is increased.
Thursday, 29 March 2018
Quality of Life, Fleshing out
The game has
come a long way up to this point, but there are many issues that have built up
that need to be addressed. After giving the game to two people to play test,
they have managed to find a few bugs that really need to be fixed before
continuing as I don’t want them to build up and be forgotten about. Doing this
now brings a nice quality of life to the game, but also allows me to tweak some
current features to make the game more playable.
The first issue
that needed to be addressed is a major gameplay issue with the ladders. After
implementing, I thought that although they didn’t match the grid squares, they
couldn’t be placed on top of other objects. This however was not the case, as
one tester found that falling and placing resulted being able to place them
anywhere. One fix that I put in place immediately is one that stops the Player
from placing them while they are not on a ground tile. This means that if they
are not standing on a solid tile or ladder, they are not able to place a
ladder. I then went on to fix the ladder positioning, meaning that when placed,
they couldn’t be in the middle of a square. I did this by taking the player’s x
coordinate and flooring it -meaning that the ladder could only be placed on an integer
value -which in turn aligned them with the rest of the level assets.
After implementing
the quality of life changes I thought it was time to add in a game over screen.
This screen will be shown whenever the Player dies. Unfortunately, due to the
way I have set it up, it was not possible to create this the way I wanted it
due to the time constraints. The end result of what I would have liked was a
way of passing the damage type (from DamagePlayer
function) to the end game screen. For now, the message simply reads “You have
died”. The way I achieved the end screen was from the DamagePlayer function that I created earlier.
Additionally,
parts of the game needed fleshing out. Although I had created the sprites for
the ores, along with scripts, they didn’t actually do anything as the scripts
were empty. This needed changing, so I made sure that all variables within the
dirt script were generic, such as the current and maximum health. This means I
could just simply copy and paste the code for each ore and change the values
for each one accordingly. Initially upon creating the ore, I was going to use
prefabs. This system could have been developed much better if I had of known
about scriptable objects.
Thursday, 22 March 2018
Player Health, UI and Fall Damage
It’s time to add
some danger to the game. As of yet, there are currently no danger elements so
the first one I will be implementing will be fall damage. To go along with
this, I’ll be updating the UI to add the health, cash and depths displays, as
well as preparing it for the upcoming stamina feature.
One thing I’ve
learnt over the course of creating this game is that centralisation is a key
part of programming -it’s important to keep code in a logical order. With that
in mind, I proceeded to handle all damage from the PlayerController script and any incoming damage information would
be passed to a function called DamagePlayer
(float damageToGive, string damageType). The variables in the brackets are
called ‘overloads’. This means that whenever this function is called, it will
require that this data is passed to the function. In this instance, I’m passing
the amount of damage and the type of damage respectively. With this in place, I
could now proceed to developing the fall damage mechanic.
Fall damage is
seen in many games. A good example of a fall damage system is from the game Minecraft, where falling from a certain
number of blocks in height will result in base fall damage. Falling from any
block after the threshold height results in a fixed amount of damage, based on
an algorithm. For my game, I won’t include any complex algorithms as that’s not
necessary. What I’m looking for is a system which, if falling from a height
greater than or equal to 5 units, will result in fall damage equal to (fall
distance * fall damage multiplier (1.5)). i.e. falling from a height of 5 will
result in 7.5 fall damage. Once the damage has been calculated, it’s then
passed through to damagePlayer, which for now, outputs that damage in a Debug.Log.
Implementing
fall damage was tough, as I had to come up with a way to calculate the falling
damage based on where the Player started and ended. The challenge came when I
figured that I needed to update the Player’s current position only when they
were on the ground. I achieved this by using a ray cast which fired downwards
from the centre of the Player, and whenever a collision is detected, it
triggers a bool on the Player to true (isGrounded).
I chose to use a ray cast after first attempting to use the box collider to
detect collisions using the OnTriggerEnter,
OnTriggerStay and OnTriggerExit functions. However, this led to problems
where the Player was able to collide with the side of objects, which would set
isGrounded to true, therefore nullifying the damage completely if they
exploited this. Basically, whenever the Player is standing on an object that’s
considered to be ground, the Player’s position is updated to a variable called lastPositionY. Once the Player starts
falling, lastPositionY stops getting
updated while the player’s current y position is changing. Upon hitting the
ground, the function takes the lastpositionY
and subtracts that from the player’s current Y position, thus giving me the
fall distance. This system gave me the opportunity to use and understand ‘getters
and setters’.
Monday, 12 March 2018
Inventory Animation, Depth Counter, Fixed Mining Bug
Currently there are no tell-tale signs when the Player
has filled their inventory. Sounds won’t be added until later down the line, so
rather than just placing a Debug.Log statement to output it to the console, I
figured that now was a good time to add a notification telling the player that
there were no more inventory slots available. Up to this point, mining with a
full inventory would still destroy the rock, just that no item would be
received, I decided to change this while I was at it.
To start with, I added a check within the Mining.cs
script, whenever a target has been hit by the ray cast, then the player’s
inventory will be checked using the function CheckInventory. If there’s space,
then the player can deal damage and upon destroying the rock, the UI is updated,
and the Player’s inventory is checked again. The inventory check is simple: if
the inventory is full, then a trigger is set to true within the animator on the
inventory, and this will trigger the inventory full notification once, which
plays the animation. Whenever I’m developing a system such as this, especially
where many events are being called from multiple scripts, I try and think about
the best way to do it so that events are only fired when they need to be, and
if possible, not from multiple places. This not only helps with optimisation
but also with problem solving later down the line because it reduces the
possible places that something is being called from. Because of this way of
thinking, I try to develop systems that don’t require to be called every frame,
but rather from a chain of events.
Moving onto the next feature, I added a depth counter.
This counter will act as ‘high score’ system as well as giving the player some
feedback about what level of danger they are in. The only problem with this
system is that because the level is generated from a sprite, I can’t modify the
world position. To combat this, I have had to get the player’s y position and
subtract 152 from it to set the depth count to zero. I also would have
preferred that the depth counter was a positive number, but I was not able to
achieve this.
The final update of this section was a bugfix with the
mining. This bug occurred if the player changed their mining target without
letting go of left-click. The problem: Ores would not regenerate health unless
the Player stopped mining completely, and this bug was a tricky one to fix. The
solution that I found for it was to store the Player’s target (which is already
stored in a variable) into another variable called previousTarget. This way, whenever the player selects a new target,
the previous one will regenerate health. At first, I didn’t think this would
even work, as when the player’s inventory was full, I was getting a reference exception error, which stated
that an object was still trying to be referenced even though it had been destroyed.
However, I managed to fix this by setting the previous target to null after
regenerating health and checking if
(previousTarget != null) meaning that the code would only execute if there
was a target in the scene.
Thursday, 1 March 2018
Ladders, Buy Items from Shop, Ore Health Regen
After giving the player the ability to dig down, there
was no way back up. This needed changing and to do so, I added ladders. Getting
the functionality right for these was tricky, and they still didn’t end up
perfect and will need further tweaking down the line. One of the issues I have
with them at the moment is that they can be placed almost anywhere, as long as
they aren’t on top of another ladder. This means that they aren’t correctly
aligned with the world space, which is something that I will look to improve later
down the line. For now, they have functionality (mostly) as intended, and fulfil
their purpose.
The Ladder uses a box collider that, when colliding with
the Player, will trigger a variable to true which allows the Player’s movement
to be changed. Once this happens, gravity gets disabled on the Player’s rigid
body. For these ladders to be implemented into the game however, they need to
be purchased from the shop. This means that the buy menu required setting up.
Setting up the buy menu was much easier than I thought it
would be. All I had to do was create a list, which I could then drag items into
it from the inspector within Unity. I had a choice between using scriptable
objects or prefabs. In this case, seeing as different items would need
different data, I chose to use prefabs.
Something I
wasn’t happy with was the interaction with ores. After mining them, but not to
the point of being destroyed, they would remain on the health that they got
down to indefinitely. This meant that it was constantly in one state or
another, resulting in many ores being cracked at once. This interaction just
didn’t seem to suit the game, so to change I added in a system that regenerates
health should the player stop mining.
Thursday, 22 February 2018
Shop interface
Once the player approaches the shop, they are prompted to press ‘E’ to open the shop. This will then prompt then with an interface to either buy or sell. The buy menu is currently in place but has no functionality as this is a slightly larger job than the ability to sell.
Upon clicking sell, the interface updates to a selling
screen. Slots dynamically appear based on the items currently in the Player’s
inventory.

(Fig. 2) shows
what the slots look like and as can be seen, the player has two items in their
inventory, which have loaded into the shop interface. Upon clicking the ‘Sell’
button underneath any of the items, the items will be removed from the
inventory and the player will granted an amount of
gold depending on the items worth. With the addition of the shop, the
player can now mine and sell ores. The next task for me is to give the player a
way to navigate the level, as currently when they dig down there is no way to
get back up. This ties in with getting the buy menu updated, as it’ll give me
an item to use as a placeholder.
 |
| Figure 2 |
Wednesday, 7 February 2018
Inventory System, Inventory UI
Implementing the inventory system proved to be a far
larger challenge than I had anticipated. First off, I had no idea where to
start… After doing a bunch of google searches I realised that the code I was
about to deal with just shot up in difficulty from beginner to intermediate.
Suddenly I was looking at loops and wondering how to make head nor tail of it
all. This is when I stumbled upon YouTube
user GameGrind, and his playlist
on an inventory system.
After tweaking and playing with the fully built system,
there were still parts of it that I didn’t understand, and there’s no use
implementing a system that I don’t understand cause after all, if I want to
modify it in the future then I’m not going to know where to start. This however
did give me a much greater understanding of loops, and how object data is
stored.
Using this knowledge, as well as a helping hand from YouTube user Brackeys -and his tutorial on scriptable objects, I was able to put
together an inventory system that worked, one that I fully understand and one
that I am happy to move forward with. One of the issues that I ran into was
with the UI system. It felt strange clicking play and seeing the inventory,
already open. To change this, I disabled the objects in the scene using gameObject.SetActive(false) although
this issued an error. It turns out that this completely disables an object,
therefore any scripts attached to said objects cannot be accessed. I did
however find a workaround, thanks to Unity Forum user akingdom. The workaround was to add a canvas group to the inventory
UI with an alpha of zero and making it noninteractive. This means that anything
tied to the canvas group would be fully transparent and couldn’t be clicked on.
The short version of how my inventory system works is
that I create a scriptable object of the ore that I want, attach it to the ore
prefab and then when mined, the object will be added to a list along with all
the data that the object holds. This means that at any given time, each slot in
the inventory can be accessed, along with data such as quantity, whether it
stacks with other objects etc.
The game now also contains a working UI system that the
player can open and close, keeps track of how many items the player has can
restricts the amount that they can hold. In addition, I added a cash variable
and display ready for the next major update: the shop.
In its current state, the Player can mine ores but has
nowhere to take them. This leads the next stage of development to a shop where
the player can trade in their ores to purchase equipment upgrades.
Thursday, 1 February 2018
Ores Take Damage, Ore Animations
In the last part
of this project I implemented the mining and animations and it was now time to
move onto the damaging of the ores. To implement this system, I used a similar
system that I used in Unit 603, which was a override method. All ore blocks
inherit from an empty script called HealthManager.
This allows me to set individual stats up within an ore’s script, and then
these values can override the method within the HealthManager script.
The challenge
with this part was figuring out the best way to apply damage, and this was the
best way that I could see fit. I also implemented the state system, and each
state represents 20% of the ore’s health. At each state I set the sprite to
change to a cracked or even more cracked version of the current sprite. My
reason for using states is that it allows me to add events further down the
road, such as explosions from the ore, or gems / valuable items dropping /
being found. If I choose to implement this, it will come after the core
elements of gameplay have been implemented.
Speaking of core
elements of gameplay, this leads me onto the next development that I will be
working on; the inventory system. At this current state of the game, the player
can mine the ore, but it’s only being destroyed. This means that I need an
inventory system so that the ores can be stored, to later be sold to the shop.
My next post will demonstrate how I’ve come to implement the inventory system.
Monday, 22 January 2018
Mining, few tweaks
The next step is
to implement a mining system allowing players to mine rocks. This feature,
unlike the previous, is going to be quite challenging. I have been looking
around on the internet for help sources and have found very little, therefore a
lot of the implementation will come from experimentation.
I am going to
treat the ore blocks like enemies to the Player, this will make the
implementation easier and I will use ‘health’ as a way of determining the
rock’s state. I will incorporate this with the work that I have just done for Unit 603 – Using AI in Computer Games,
to which I created a working state machine system. These states can help me to
determine the physical state of each rock as it gets damaged, and I’m hoping to
be able to use these states to change the sprite.
EDIT - 27/01/2018: Update!
I have
implemented the mining part of the system. There is currently no interaction,
but there is collision being detected. The solution I found was to fire out a
Ray-cast in the direction that the player is facing (determined by movement
input). The hit data of the Ray-cast is stored in a variable, which I am
currently using to log the name of the object hit to the console. One problem
that I have come across is that I’m not sure how to deal with the animations. I
believe that I would need to create a totally new set of animations for if the
player is walking and mining at the same time. To combat this, as it looks
strange, I have made it so that the Player can only mine when not moving
(mining interrupts movement).
I also added a
nice sky background to the level that I made in GIMP. It was created using a
simple gradient of blue to white. Furthermore, the camera now finds the Player
in the scene at game start and follows him around. There’s a bit of smoothing
time, the camera ‘lags’ behind the Player, I’ve done this because I find that
it’s easier on the eyes if the player isn’t always
in the centre of the screen. For the duration of the next week, I will be
working on implementing the second part to the mining: applying damage to the rocks.
Monday, 8 January 2018
First level, Player Character and Animations
 |
| Figure 1 |
 |
| Figure 2 |
 |
| Figure 3 |
Once the level was in place it was time to implement the Player Character and animations. This will enable me to be able to walk around my newly implemented level and open doors to some of the more juicer programming. Implementing the character was easy using the animation and animator windows within Unity.
The animator tool uses ‘States’ and ‘Parameters’ to work. States are the current form or standing that the object is in, while the parameters are conditions which help to transition between those states. I found that these states work better if there is a ‘base’ state – by which I mean a state which is default, has no animations attached to it, and can transition to any state depending on whether the parameters have been met, for this I called it ‘Player_Idle’. After creating the ‘Player_Walk’ animation (fig. 3), I simply then dragged this animation into the animator window and added the parameter of ‘isIdle’, which will transition to the walk state if it’s false. The final step was to add the code for the movement and voila! Our player can now move around the level!
Friday, 22 December 2017
Laying the Foundations
My goals for the first week were to lay down the foundations for the project. This was anything from setting up any folders that I might need, to creating my first scene. This scene is going to be used as a ‘landing screen’ -meaning that it’ll be the first screen that the player sees when the game starts. From here, they will be able to start or quit the game, and possibly even change options such as sound and screen resolution.

I’ve set up a basic start menu with button functionality. Clicking any of these buttons highlights then and runs its appropriate function (see appendix).
Thursday, 7 December 2017
Starting the Development - Introduction
The posts from this point forward will be about the
development of the game. Over the past few weeks I’ve researched the game that
I would like to create, and now I must put that into practice. For the entirety
of this project, I will be learning new and exciting things about the world of
programming. I have chosen to develop my project in Unity, using C#.
Each post that I
create will contain the features that I have implemented from a summary point
of view. I would like you to bear in mind that the development process won’t be
as straightforward as portrayed in my posts, but I will do my best to document
the struggles I have encountered along the way. I expect this project, Mini
Miner, will be a great challenge given the time frame.
During the
course of this year I will be researching mainly from two sources: a course
that I have purchased on Udemy, and also the YouTube user GamesPlusJames. The Udemy course will be a great step towards
learning the basics of the programming language, and once I have this knowledge
I will be doing research on GamesPlusJames’
YouTube playlist titled “Learn to make an
RPG game & learn C#”. The next week or so I will be starting my
research before the actual development begins.
References to all help sources will be
posted at the end of the blog, upon completion of the project.
Thursday, 23 November 2017
Creating the Player Sprite Sheet
Last week I created the ores, this week I have
developed the Sprite Sheet for the Player. This also entailed researching how I
was going to implement the Player sprites. The best way that I can see (might
change upon development) is to use the Animator tool within Unity. This allows
me to simply add each sprite to the animator using 'key frames'. I imagine that
when I get around to implementing this it should be a lot easier seeing as I will
have used 'Key frames' for Unit 601: 3D Modelling and Animation. I imagine that
it won't be much different in Unity.
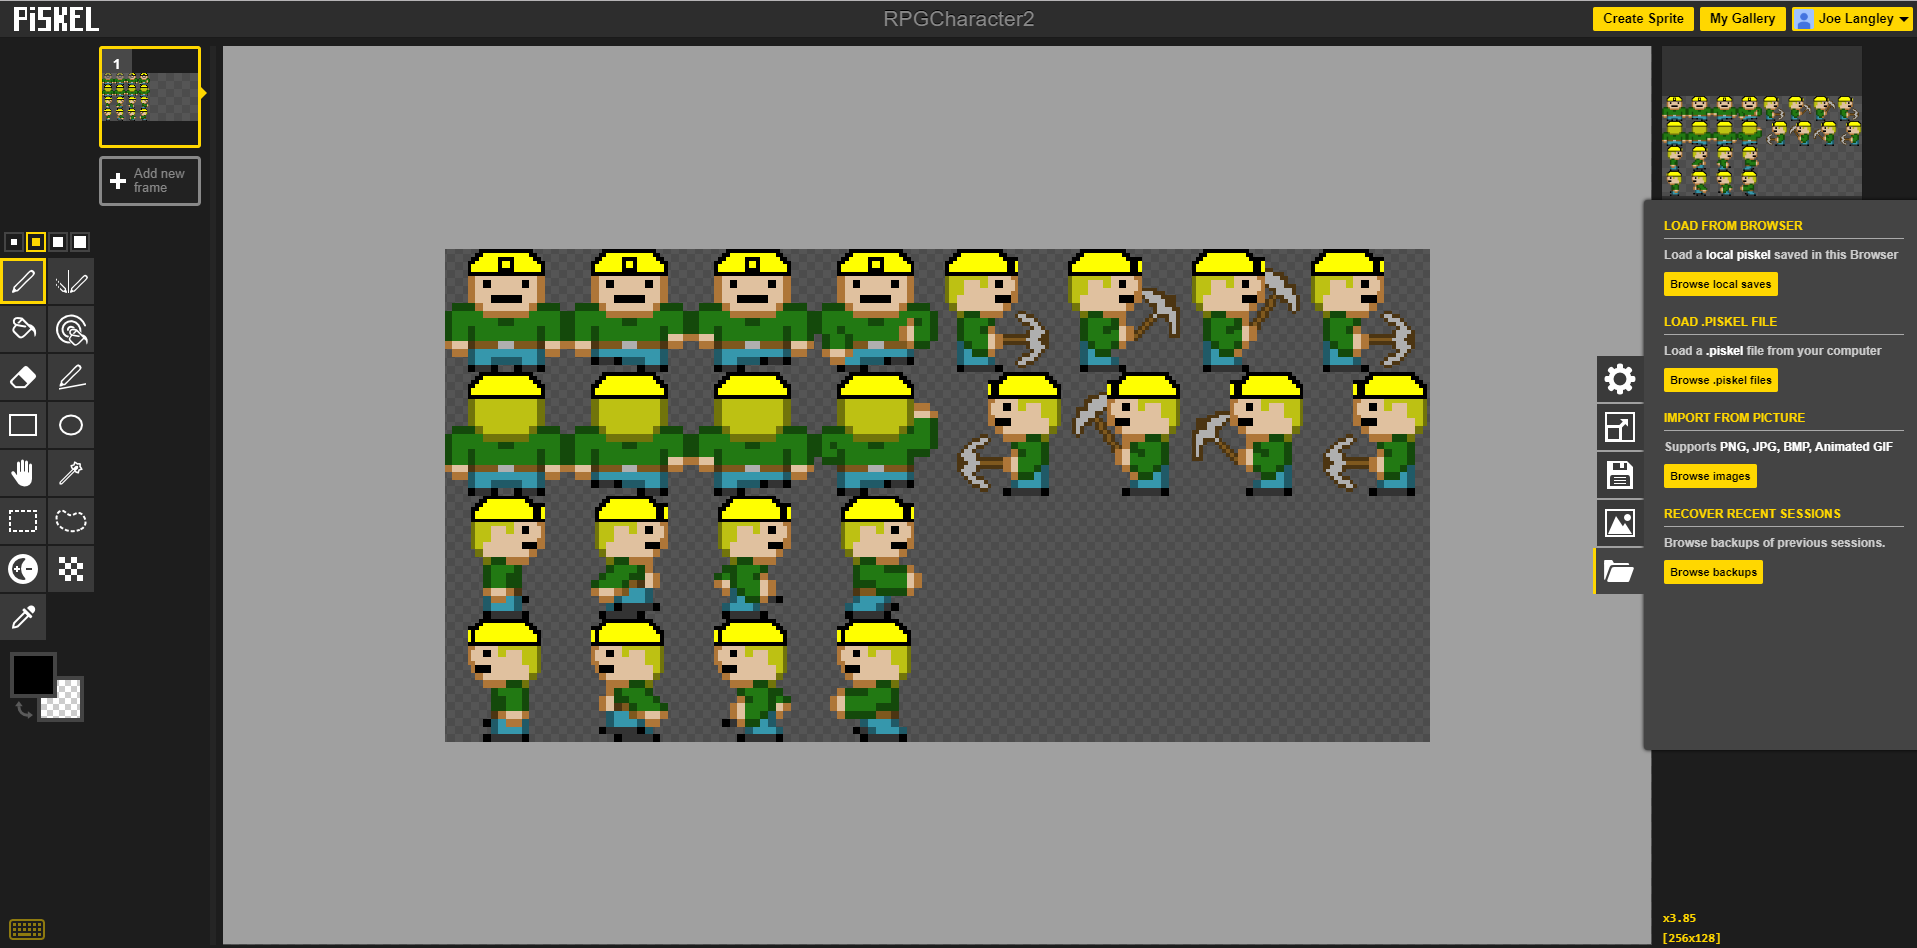
The basic iteration for creating a Sprite Sheet (fig.
1) is to have a motion for each direction. The nice thing about Piskel is
that I can preview how my animation is going to look using the animator tool.
The way this work is by adding each image onto a 'frame' on the left-hand side,
this will then play through at whatever speed I choose on the right-hand side.
The left half of this Sprite Sheet are the movement
animations. The right-side of this sheet is for when the player is mining. Being
able to preview the animation for the mining within Piskel saved me a lot of
time and convenience and allowed me to fine-tweak it.
Subscribe to:
Posts (Atom)
-
Due to the length of the appendix, it wasn't suitable to display it here. Please download this document to view the appendix.
-
The game is now in a place that I feel comfortable with. Now, seeing as time is running out, it’s time to make the game playable. Certain...
-
 My goals for the first week were to lay down the foundations for the project. This was anything from setting up any folders that I might ne...